

Introduction
The Garmin Forerunner 945 is considered one of Garmin's best-selling watches for running and triathlons. Nevertheless, after using the device for several years, problems such as a cracked display, touch screen malfunction, broken casing, or battery deterioration may emerge. Luckily, in many cases, these problems can be solved at home.
This article provides an in-depth guide on how to properly disassemble and repair the screen for Garmin Forerunner 945.
Tools and Replacement Parts for Garmin Forerunner 945
Before starting, prepare the following tools and replacement parts for Garmin Forerunner 945 repairs:
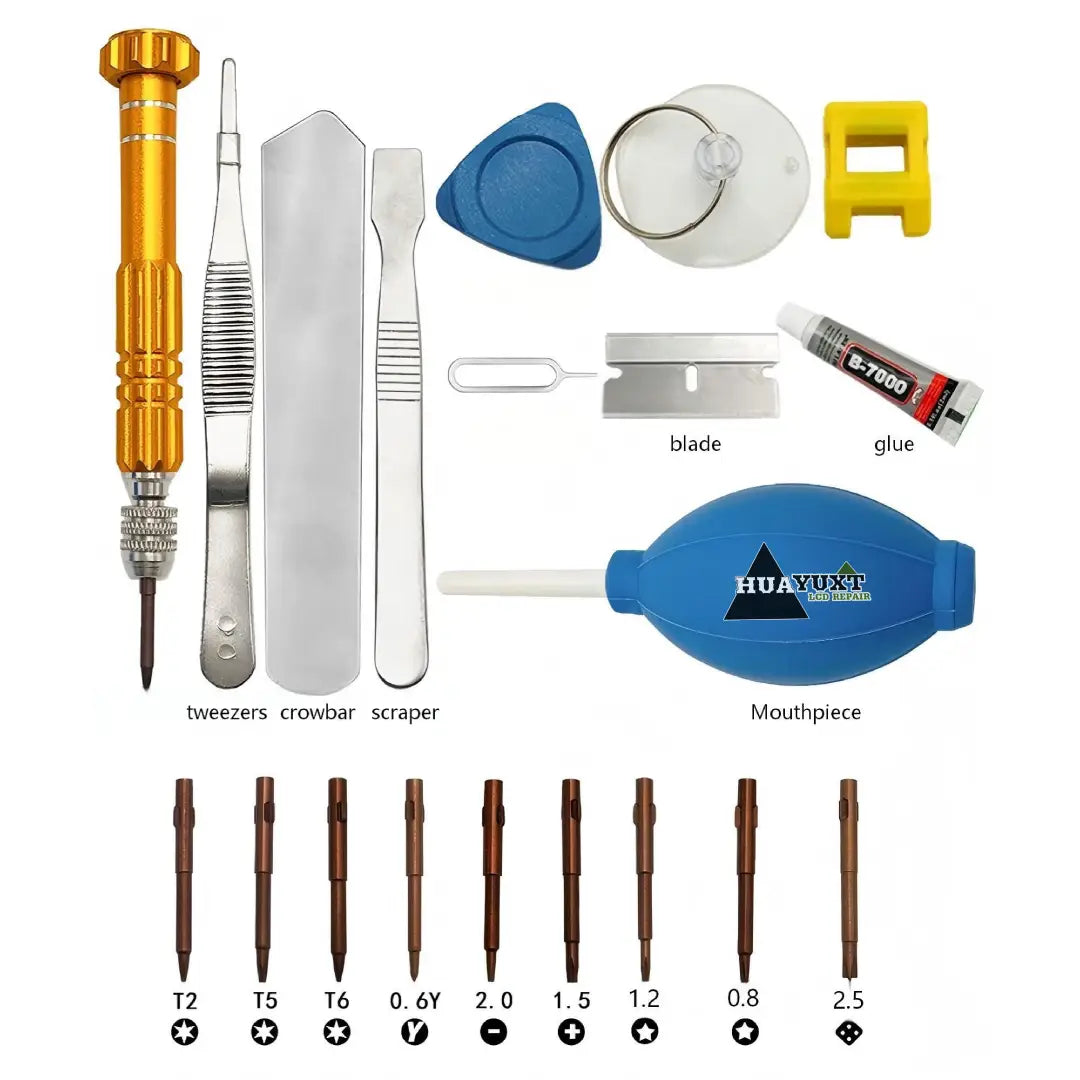
Recommended Tools
- Hair dryer or heat gun
- Razor blade or thin pry tool
- Plastic opening tool
- Tweezers
- Alcohol wipes
- Gloves
- Adhesive glue
Common Garmin Forerunner 945 Repair Parts
- Garmin Forerunner 945 screen replacement
- Garmin Forerunner 945 frame
- Garmin Forerunner 945 back cover case
- Battery replacement
- Charging connector
- NFC antenna
- Waterproof adhesive seal
Using quality replacement parts for Garmin Forerunner 945 repairs will help maintain durability and display performance.
Step 1 — Determining Whether You Need to Replace Your Garmin Forerunner 945 Screen

If your watch face is damaged, unresponsive, flickering, or black, you might require a new Garmin Forerunner 945 screen.
These replacement screens are available from various websites, including eBay and Amazon, and at Huayuxt.com. Most people opt for self-repairs due to high costs incurred when seeking official replacements.
It is important to note that the screen should be compatible with the Garmin Forerunner 945 watch.
Step 2 — Apply Heat to Soften the Adhesive

The screen is typically secured with strong adhesive. Please set a hairdryer to carefully heat the edges of the display for about two minutes.
Avoid applying direct heat to the watch band to prevent damaging its rubber material; you may remove the band before proceeding with the heating process.
This step is crucial, as it helps prevent other components from cracking while you disassemble the bezel and display assembly of the Garmin Forerunner 945.
Step 3 — Remove the Old Garmin Forerunner 945 Screen

Carefully slide a razor blade or a thin prying tool beneath the edge of the display.
Work slowly along the edge:
- Gently rock the blade back and forth;
- Pry upward little by little;
- If the adhesive hardens again, continue applying heat.
At this stage, patience is crucial to avoid damaging the internal connectors or the body frame of the Garmin Forerunner 945.
Step 4 — Disconnect the Ribbon Cables

Inside the watch, you will find two ribbon cables attached to the motherboard.
Use tweezers carefully to disconnect them:
- Avoid touching nearby components
- Do not force the connectors
- Work under bright lighting
These delicate connectors are one of the easiest parts to damage during a repair.
Step 5 — Remove Residual Glue

After removing the screen, some adhesive residue will remain around the inner bezel.
Please use tweezers to slowly peel away the old adhesive. If the adhesive feels too hard, apply gentle heat.
Thoroughly cleaning the surface helps ensure the new Garmin Forerunner 945 screen sits flush and enhances the effectiveness of the waterproof seal.
Step 6 — Transfer the NFC Antenna (Optional)


Some replacement displays do not come with the original NFC antenna.
If necessary:
- Carefully peel the black NFC component off the old screen;
- Transfer it to the new display;
- Ensure it is properly aligned and adhered back into its original position.
Improper placement may prevent the ribbon cable connector from seating correctly.
Step 7 — Connect the New Garmin Forerunner 945 Screen

Connecting the new display ribbon cable is often the most challenging part of the entire repair process.
Connecting that tiny black NFC connector requires:
- Ample lighting
- Sufficient patience
- Precise alignment
Many repair technicians recommend connecting the ribbon cable *before* applying the adhesive. The advantage of this approach is that if any fine-tuning is required later, the process remains much more flexible and manageable.
Step 8 — Apply Glue to the Garmin Forerunner 945 Frame

Once the cables are connected:
- Hold the screen carefully
- Apply adhesive around the inner bezel
- Press the screen firmly into place
Wear gloves to avoid glue on your hands. Clean excess adhesive using alcohol wipes before it dries.
Proper sealing around the Garmin Forerunner 945 frame helps restore water resistance.
Step 9 — Let the Screen Cure
Place an object of considerable weight onto the watch to ensure even pressure upon the screen.
Give the glue time to set for at least two hours prior to powering up the watch.
It is suggested by many watch repairers that the watch should be kept dry for at least 24 hours after gluing.
Common Garmin Forerunner 945 Repair Parts You May Need
Garmin Forerunner 945 Screen
The display is the most commonly replaced component due to cracks and touchscreen issues.
Garmin Forerunner 945 Frame
The frame or bezel may become scratched, bent, or damaged after drops.
Battery Replacement Parts
Older watches may suffer from reduced battery life or charging problems.
Charging Port Components
Corrosion and moisture damage can affect charging reliability over time.
Using high-quality Garmin Forerunner 945 repair parts improves repair success and extends the watch lifespan.
rmin Forerunner 945 repair accessories increases repair chances and enhances durability.
Premium Garmin Repair Tools Kit
>Show Now<
Final Thoughts
Repairing a Garmin Forerunner 945 at home can save significant money compared to official replacement programs. With patience, proper tools, and reliable replacement parts for Garmin Forerunner 945, even a damaged watch screen can often be restored successfully.
If you are careful during disassembly and adhesive application, your repaired Garmin Forerunner 945 screen can look and function almost like new again.