Introduction
The Garmin Rino 700 is rated IPX7, but the gasket can lose its sealing ability as it gets older. Dirt, repeated opening, heat, pressure and normal wear can leave the rubber flattened, hardened or damaged. If you notice fogging, moisture inside the case or corrosion around the seams and ports, inspect the seal before using the radio in wet conditions. A damaged gasket should be replaced rather than reused. When installing a new one, keep the sealing groove clean, make sure the gasket sits flat without twists or stretches, and use only a small amount of compatible silicone grease if lubrication is appropriate.
How to Tell If the Gasket Is Damaged
A gasket can lose its sealing ability before the damage is obvious from the outside. The most useful clues are usually moisture inside the housing, changes in the shape of the rubber, or signs that water has already reached areas that should remain dry.
- Fogging or water droplets appear behind the display or lens
- Moisture or corrosion is visible inside the housing
- White residue, oxidation or rust appears around screws, seams or connectors
- The radio develops unusual shutdowns or button problems after exposure to water
- The rubber has visible cracks, cuts, nicks or hardened sections
- The gasket has become permanently flat instead of retaining its original shape
- Part of the gasket is stretched, twisted or no longer sits correctly in its groove


Checking the Gasket and Sealing Area
Before replacing the gasket, inspect both the rubber seal and the surfaces that compress it. A new gasket cannot compensate for a damaged housing, a contaminated groove or a sealing surface that is no longer sitting correctly.
- Turn the radio off and disconnect the charging cable and any external accessories.
- Examine the outside of the housing for cracks, gaps or signs of impact.
- If the housing is opened, locate the gasket and check that it is seated correctly in its groove.
- Look for dirt, hair, sand or other debris trapped between the gasket and the sealing surface.
- Run a clean fingertip gently along the gasket to find small cuts, hardened areas or uneven sections.
- Check whether the rubber has remained rounded or has become permanently flattened.
- Inspect the mating surfaces for scratches, deformation or residue that could prevent an even seal.

If the gasket is still flexible and undamaged, replacing it may not be necessary. However, once the rubber has been cut, stretched, hardened or permanently deformed, reusing it can create a weak point in the seal.
How to Replace the Gasket
Replacing the gasket is mainly about keeping the sealing surfaces clean and preventing the new rubber from becoming twisted or displaced during reassembly.
- Turn the Rino 700 off and disconnect the charging cable.
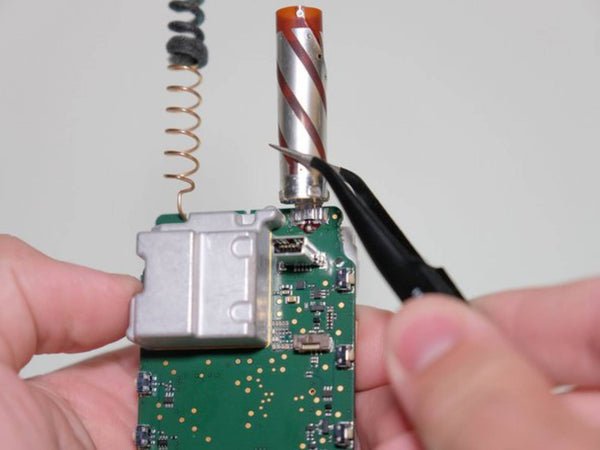
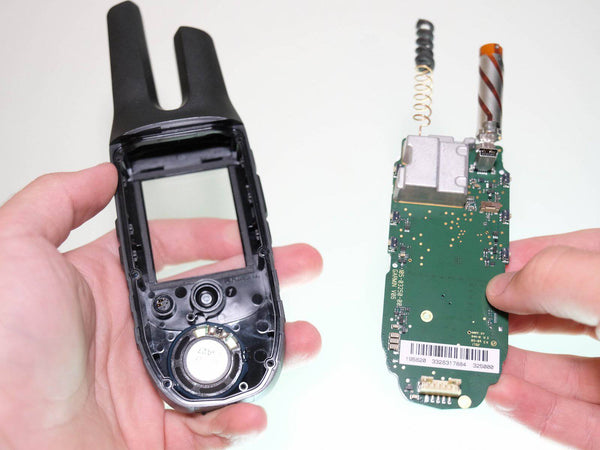
- Open the housing carefully and disconnect the internal battery before working around the circuit board.
- Remove the old gasket from its groove using a plastic pick or another non-metallic tool. Avoid scratching the groove or sealing surface.
- Remove dirt and residue from the groove and mating surface. Use a suitable electronics-safe cleaning method and allow the area to dry completely.
- Compare the replacement gasket with the old one before installation. Check its shape and size before forcing it into the groove.
- Install the new gasket gradually around the housing. Do not pull it tight or stretch one section to make it reach the end.
- Make sure the gasket is fully seated and has no twists, folds or sections sitting outside the groove.
- Reconnect the battery and carefully bring the housing halves together without pinching the gasket.
- Tighten the housing screws evenly and only to the appropriate torque. Do not overtighten them, as excessive force can damage the housing or distort the seal.

Using Silicone Grease on the Seal
A compatible silicone grease can help a rubber gasket seat smoothly and reduce friction during assembly. It should not be used as a substitute for a damaged or incorrectly fitted gasket.
If lubrication is appropriate for the replacement seal, apply only a very thin film of compatible silicone grease. The surface should have a light sheen rather than a thick layer of grease.
- Use silicone grease that is compatible with the gasket material.
- Spread a thin and even film over the sealing surface.
- Keep excess grease away from electrical contacts and connectors.
- Do not use petroleum-based grease unless the gasket manufacturer specifically approves it.
- Do not rely on grease to fill cracks, cuts or gaps in the rubber.

Checking the Seal After Repair
There is an important difference between checking a repaired housing and proving that it still meets its original IPX7 rating. A visual inspection can identify obvious gaps, but it cannot certify the water resistance of a repaired device.
- Inspect the entire seam and make sure the housing halves are sitting evenly.
- Look around the gasket line for any section that has moved, folded or become pinched.
- Check the screw areas for uneven gaps or housing deformation.
- Power the radio on and confirm that the display, buttons, charging connection and other functions still work normally.
- Keep the device dry during the first functional test and monitor it for signs of moisture or abnormal operation.
- If the radio is going to be used around water, consider additional protection such as a waterproof case or dry bag rather than assuming that a gasket replacement restores the factory rating.
A professional pressure or water-resistance test is the appropriate way to verify a specific ingress-protection rating after repair. Without that type of testing, it is better to treat the repaired Rino 700 as water-resistant rather than assume that it has returned to its original factory condition.
What a Gasket Replacement Cannot Fix
A new gasket only addresses the sealing problem. It will not repair electronic components that have already been damaged by water or corrosion.
If the Rino 700 was previously exposed to water and now has charging problems, display issues, random shutdowns, weak radio performance or buttons that do not respond correctly, inspect the internal electronics as well as the gasket.
Moisture can damage the battery, connectors and circuit board even after the housing has been resealed. In those cases, replacing the gasket is only one part of the repair.
Related repairs: Garmin Rino 700 battery replacement guide and Garmin Rino 700 screen repair guide.
Frequently Asked Questions
Is the Garmin Rino 700 waterproof after a gasket replacement?
The Rino 700 is rated IPX7, but replacing the gasket does not automatically prove that a repaired device still meets that rating. Housing condition, gasket installation and previous damage can all affect water resistance.
How do I know if the Rino 700 gasket needs to be replaced?
Look for cracks, cuts, hardening, permanent flattening, stretching or sections that no longer sit correctly in the sealing groove. Moisture inside the housing is another strong reason to inspect the seal.
Can I reuse the old Rino 700 gasket?
Only if it remains flexible, undamaged and properly shaped. If it has been flattened, stretched, cracked or hardened, replacing it is a better option than trying to restore it with grease.
What grease should I use on the Rino 700 gasket?
Use a small amount of silicone grease that is compatible with the gasket material. Avoid petroleum-based products unless they are specifically approved for the seal.
What should I do if my Rino 700 already has water inside?
Turn the radio off, disconnect external power and do not charge it while it is wet. Allow it to dry in a warm, dry and ventilated location. If corrosion or abnormal operation is present, the internal electronics should also be inspected.
Does the Rino 700 float?
No. The IPX7 rating describes water resistance and does not mean the radio will float. Use a suitable lanyard or flotation accessory when using it around water.
Unofficial repair information for educational purposes. Opening the unit may affect warranty coverage and water resistance. Garmin and Rino are trademarks of Garmin Ltd.; this site is not affiliated with Garmin. This guide covers the Rino 700 and does not cover the Rino 750, 750t or 755t, which use different hardware designs.